
Master the art of adding borders to your quilt top.
Attaching borders the correct way avoids waviness and pleats when you get it back from the longarmer. The method may seem tedious when you are so close to having your quilt top finished, but I urge you not to skimp on this technique – it is the final step to ensuring a square quilt top.
Borders are usually sewn to the two longest sides of the quilt first, and then to the remaining two sides with the final two extending straight across the ends of the first borders.
Cut your borders
Cut border stripes to the desired width.
If needed, sew strips end-to-end to achieve a length longer than your quilt edge.
DO NOT cut the strips to the length noted in your pattern.
Measure the borders
Starting with the longest side of your quilt top. Place two border pieces right-sides together and square one set of ends.
At the center point of the quilt top, line up the squared ends to the quilt top. Lay the strips across the center of the quilt beyond the other edge of the quilt top.
Place a small cutting mat under the quilt top. Use a square ruler to trim the excess border.
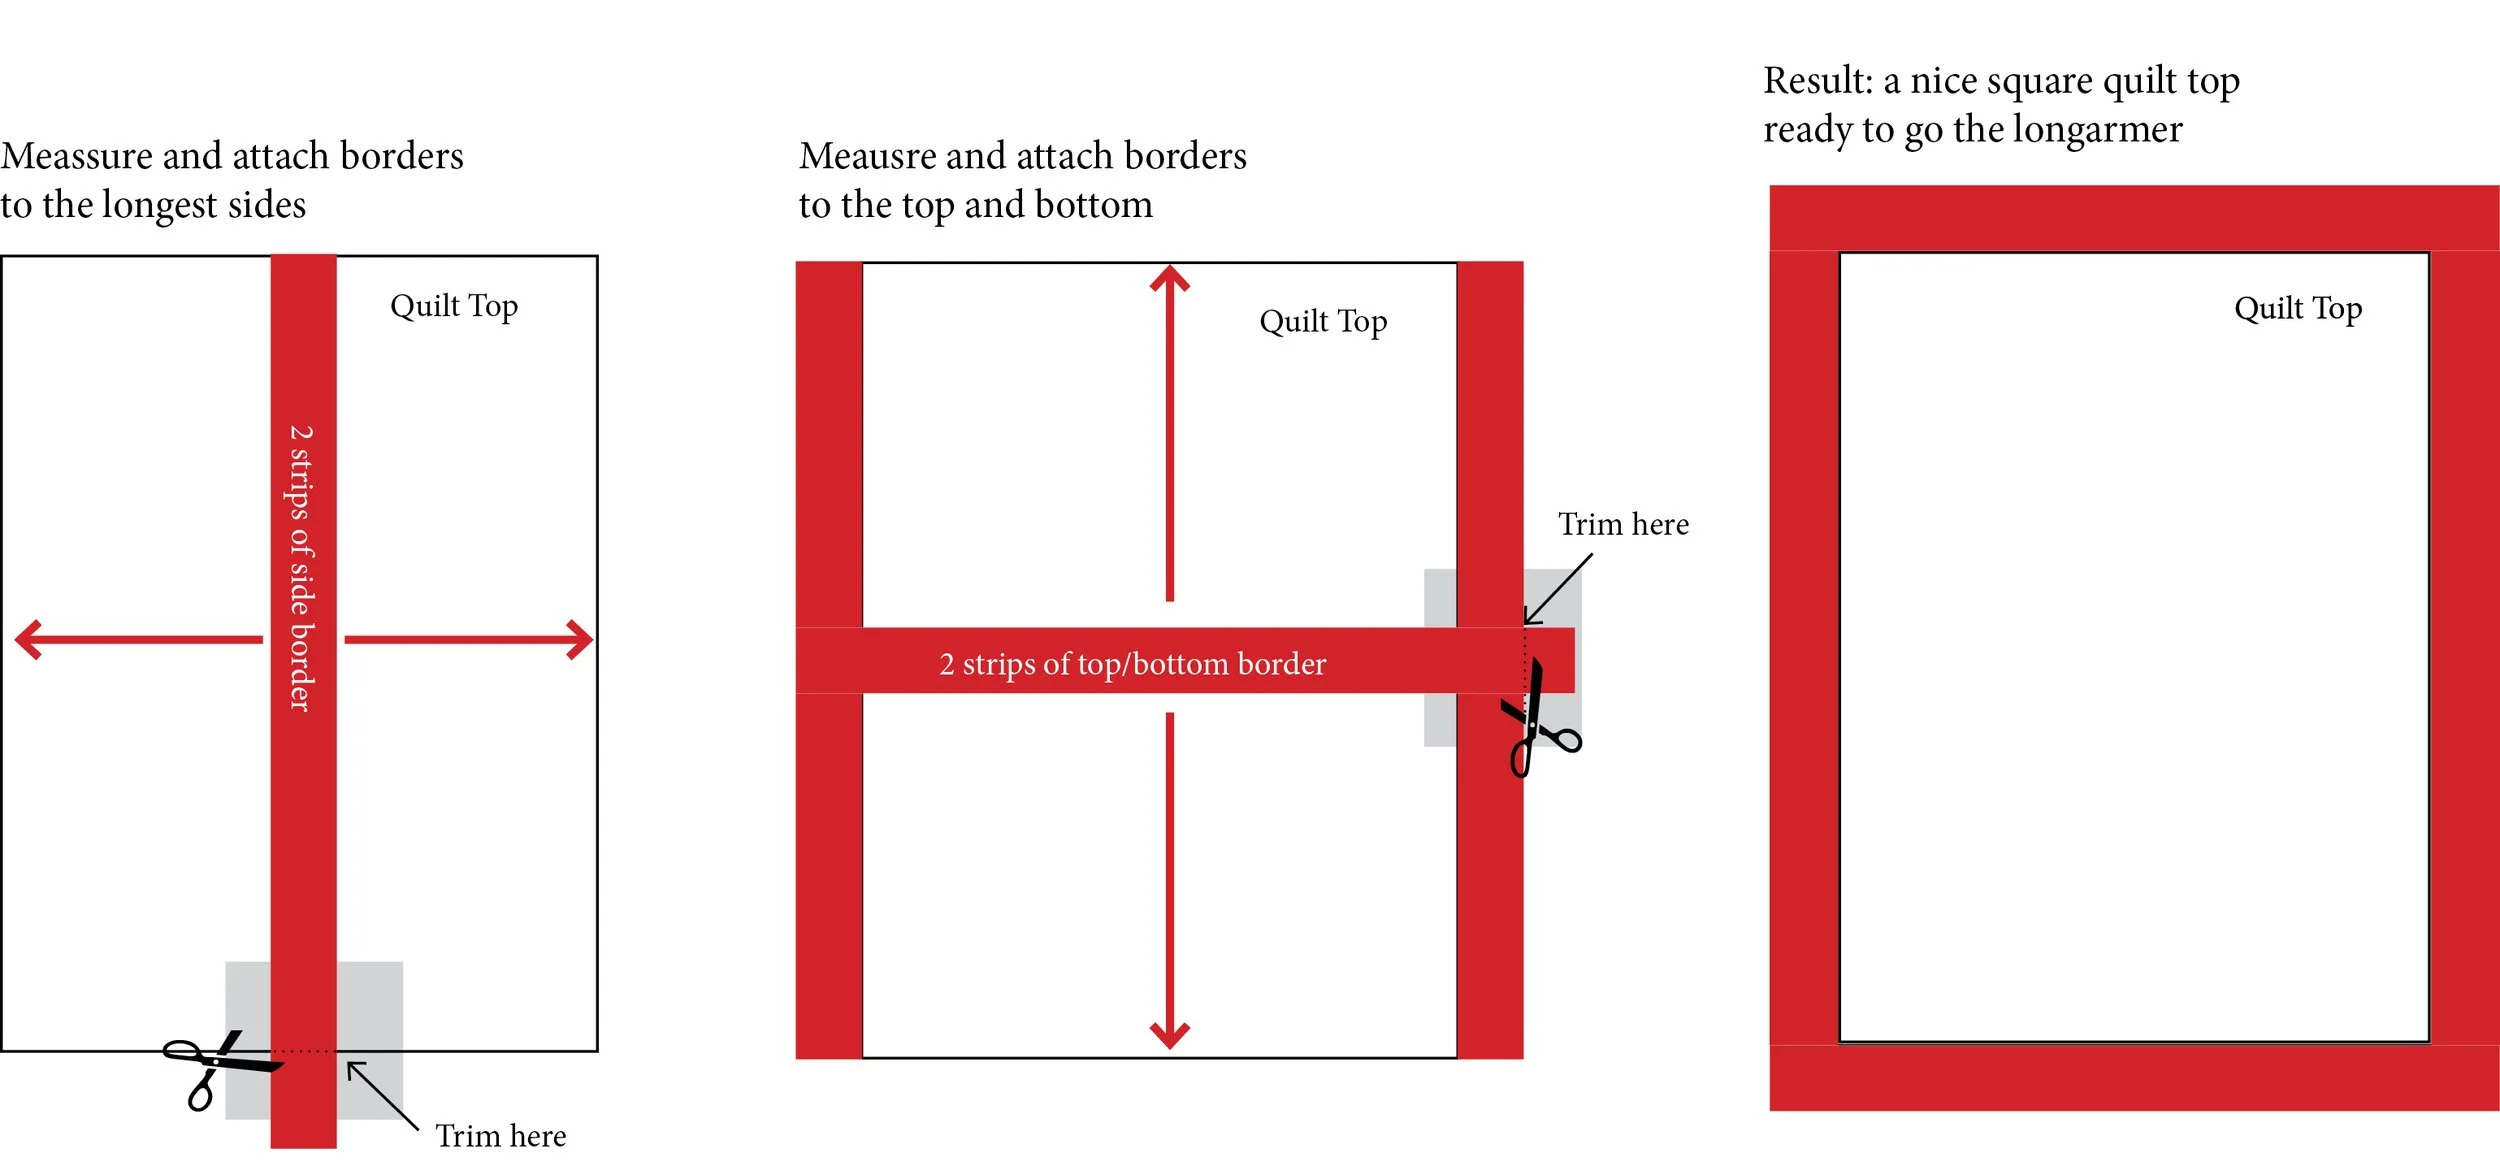
Technique for adding borders to a quilt top – measure, pin, ease-in while sewing.
Attach the borders to the quilt
Fold one of the borders in half lengthwise to find its midpoint, using your fingers to crease it slightly at that spot.
Match the border’s center point to the quilt’s center point, and pin all layers at that center point.
Align the border ends to the quilt’s edges and pin all layers.
Continue pinning the border from the center to each side, easing in any fullness.
Sew the border to the quilt with a 1/4 inch seam, easing in any fullness between the pinned intervals.
Press seams toward the border.
Attach remaining borders using the same technique.
If your quilt has multiple borders, each border should be attached separately, using the above technique. It is not recommended to sew all the multiple borders together and attach them as one unit. You will be disappointed with the final result.

Multiple borders on the Entwined quilt pattern from Connecting Threads.
